平常我们用的都是Linux Container,这些容器用的都是Linux的内核,而今天我们要记录的是Windows Container,就是讲这些容器用的是Windows的内核,Windows内核是啥?那就是Windows NT。
查看你的Windows内核版本,可以用
1
| Get-ComputerInfo | Select WindowsProductName, WindowsVersion, WindowsInstallationType, OsServerLevel, OsVersion, OsHardwareAbstractionLayer
|
类似输出
1
2
3
4
5
6
| WindowsProductName : Windows 10 Pro for Workstations
WindowsVersion : 2009
WindowsInstallationType : Client
OsServerLevel :
OsVersion : 10.0.19044
OsHardwareAbstractionLayer : 10.0.19041.1566
|
上面NT的版本是10.0.19044。
环境
- 安装 .NET 6 SDK
- Windows Server 2022
- Docker(针对Windows Server的docker,没有UI的)
- 安装一个喜欢的代码编辑器,例如 Visual Studio(Code)。
Docker
若要在 Windows Server 上安装 Docker,可以使用由 Microsoft 发布的 OneGet 提供程序 PowerShell 模块(称为 DockerMicrosoftProvider)。 此提供程序启用 Windows 中的容器功能,并安装 Docker 引擎和客户端。 以下是操作方法:
打开提升的 PowerShell 会话,从 PowerShell 库安装 Docker-Microsoft PackageManagement 提供程序。
1
| Install-Module -Name DockerMsftProvider -Repository PSGallery -Force
|
如果系统提示安装 NuGet 提供程序,还请键入 Y 进行安装。
如果在打开 PowerShell 库时遇到错误,则可能需要将 PowerShell 客户端使用的 TLS 版本设置为 TLS 1.2。 为此,请运行以下命令:
1
2
| # Set the TLS version used by the PowerShell client to TLS 1.2.
[System.Net.ServicePointManager]::SecurityProtocol = [System.Net.SecurityProtocolType]::Tls12;
|
使用 PackageManagement PowerShell 模块安装最新版本的 Docker。
1
| Install-Package -Name docker -ProviderName DockerMsftProvider
|
PowerShell 询问是否信任包源“DockerDefault”时,键入 A 以继续进行安装。
在安装完成后,请重启计算机。
1
| Restart-Computer -Force
|
Windows Container
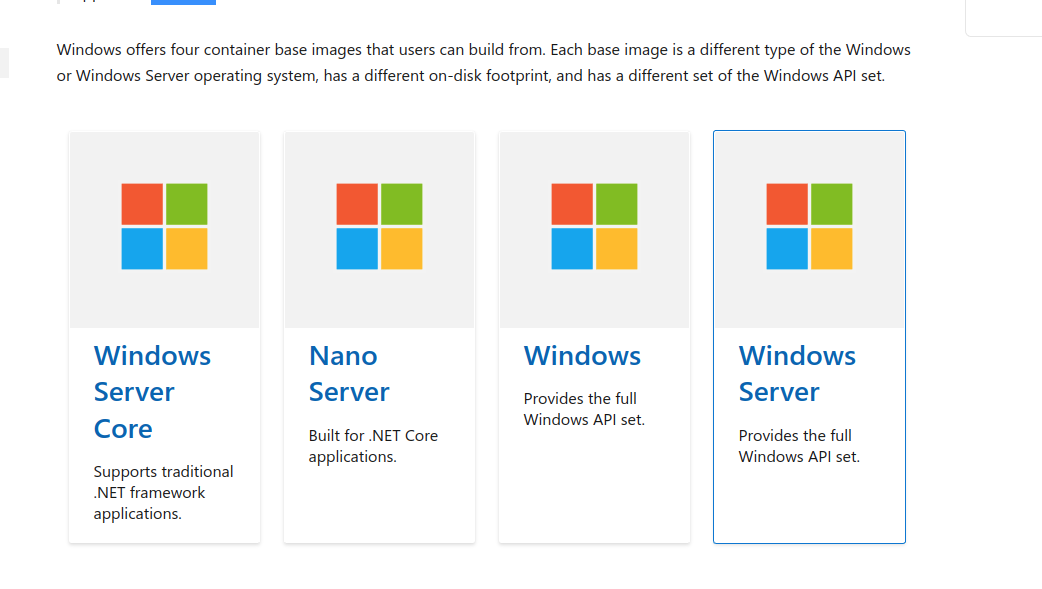
我们知道Linux容器的Base Image是alpine或者scratch, 那Windows容器的Base Image是什么呢?其实微软官方也有介绍了。

好了,我们进入正题。
要确保当前Docker是使用Windows Container的,我们可以拉个镜像
1
| docker pull mcr.microsoft.com/windows/nanoserver:ltsc2022-amd64
|
如果看到错误消息“no matching manifest for linux/amd64 in the manifest list entries”,那说明 Docker 用的是Linux 容器。
注意:mcr.microsoft.com上的镜像在国内访问挺慢的,你可以先把镜像pull到阿里云,然后再在你电脑上拉取。
我们跑一个简单容器(执行cmd)
1
| docker run -it mcr.microsoft.com/windows/nanoserver:ltsc2022-amd64 cmd.exe
|
在容器中执行一些命令:
 1
 2
 3
 4
 5
 6
 7
 8
 9
10
11
12
13
14
15
16
17
18
19
20
21
22
23
24
25
26
27
28
29
30
31
32
33
34
35
36
37
38
39
40
41
42
| C:\>dir
Volume in drive C has no label.
Volume Serial Number is F63B-D098
Directory of C:\
05/05/2022 10:35 AM 5,510 License.txt
05/05/2022 10:37 AM <DIR> Users
05/11/2022 03:37 PM <DIR> Windows
1 File(s) 5,510 bytes
2 Dir(s) 21,302,714,368 bytes free
C:\>hostname
fbb1d7595c03
C:\>ipconfig/all
Windows IP Configuration
Host Name . . . . . . . . . . . . : fbb1d7595c03
Primary Dns Suffix . . . . . . . :
Node Type . . . . . . . . . . . . : Hybrid
IP Routing Enabled. . . . . . . . : No
WINS Proxy Enabled. . . . . . . . : No
DNS Suffix Search List. . . . . . : lan
Ethernet adapter vEthernet (Ethernet):
Connection-specific DNS Suffix . : lan
Description . . . . . . . . . . . : Hyper-V Virtual Ethernet Container Adapter
Physical Address. . . . . . . . . : 00-15-5D-E5-CC-89
DHCP Enabled. . . . . . . . . . . : No
Autoconfiguration Enabled . . . . : Yes
Link-local IPv6 Address . . . . . : fe80::a0c8:ad95:72dd:fe6f%17(Preferred)
IPv4 Address. . . . . . . . . . . : 172.30.150.168(Preferred)
Subnet Mask . . . . . . . . . . . : 255.255.240.0
Default Gateway . . . . . . . . . : 172.30.144.1
DNS Servers . . . . . . . . . . . : 172.30.144.1
10.0.2.3
NetBIOS over Tcpip. . . . . . . . : Disabled
Connection-specific DNS Suffix Search List :
lan
|
可以看到,容器中目录还有hostname,网络都是隔离的。
运行一个ASP.NET程序
dotnet 6已经可以很方便的创建asp程序的骨架了,创建新目录myweb, 终端输入dotnet new web,然后sdk就帮你创建了一个hello world程序。
看一下Program.cs的内容:
1
2
3
4
5
6
| var builder = WebApplication.CreateBuilder(args);
var app = builder.Build();
app.MapGet("/", () => "Hello World!");
app.Run();
|
恩,蛮简单的,我们在宿主机上运行dotnet run,输出
 1
 2
 3
 4
 5
 6
 7
 8
 9
10
| info: Microsoft.Hosting.Lifetime[14]
Now listening on: https://localhost:7174
info: Microsoft.Hosting.Lifetime[14]
Now listening on: http://localhost:5017
info: Microsoft.Hosting.Lifetime[0]
Application started. Press Ctrl+C to shut down.
info: Microsoft.Hosting.Lifetime[0]
Hosting environment: Development
info: Microsoft.Hosting.Lifetime[0]
Content root path: /your_path/myweb/
|
curl http://localhost:5017返回了Hello World!,速度阔以的。
为了在Docker中运行程序,我们需要创建一个Dockerfile
 1
 2
 3
 4
 5
 6
 7
 8
 9
10
11
12
13
14
15
| FROM mcr.microsoft.com/dotnet/sdk:6.0 AS build-env
WORKDIR /app
# Copy everything
COPY . ./
# Restore as distinct layers
RUN dotnet restore
# Build and publish a release
RUN dotnet publish -c Release -o out
# Build runtime image
FROM mcr.microsoft.com/dotnet/aspnet:6.0
WORKDIR /app
COPY --from=build-env /app/out .
ENTRYPOINT ["dotnet", "myweb.dll"]
|
当然,为了docker build能快点,我们应该添加一个.dockerignore文件
 1
 2
 3
 4
 5
 6
 7
 8
 9
10
11
12
13
14
15
16
17
18
19
20
21
| # Build results
[Dd]ebug/
[Rr]elease/
x64/
[Bb]in/
[Oo]bj/
# build folder is nowadays used for build scripts and should not be ignored
#build/
# NuGet Packages
*.nupkg
# The packages folder can be ignored because of Package Restore
**/packages/*
# except build/, which is used as an MSBuild target.
!**/packages/build/
# Uncomment if necessary however generally it will be regenerated when needed
#!**/packages/repositories.config
# MSTest test Results
[Tt]est[Rr]esult*/
[Bb]uild[Ll]og.*
|
好了,现在执行docker build -t fuck_image .,构建镜像成功后,可以看到
1
2
3
| PS C:\Users\Administrator> docker images
REPOSITORY TAG IMAGE ID CREATED SIZE
fuck_image latest a8b482b53388 5 hours ago 392MB
|
我们跑个容器docker run -d --name fuck_asp fuck_image,查看容器日志docker logs fuck_asp,发现它的http端口是80
1
2
3
4
5
6
7
8
| info: Microsoft.Hosting.Lifetime[14]
Now listening on: http://[::]:80
info: Microsoft.Hosting.Lifetime[0]
Application started. Press Ctrl+C to shut down.
info: Microsoft.Hosting.Lifetime[0]
Hosting environment: Production
info: Microsoft.Hosting.Lifetime[0]
Content root path: C:\app\
|
进入容器执行curl
1
2
3
| docker exec -it fuck_asp cmd.exe
C:\app>curl http://localhost
Hello World!
|
OK了。
注:你的Windows Server如果是跑在虚拟机中的,获取虚拟机的ip有个命令:VBoxManage guestproperty get "Win Server2022" "/VirtualBox/GuestInfo/Net/0/V4/IP"
参考:
